
 Pin it
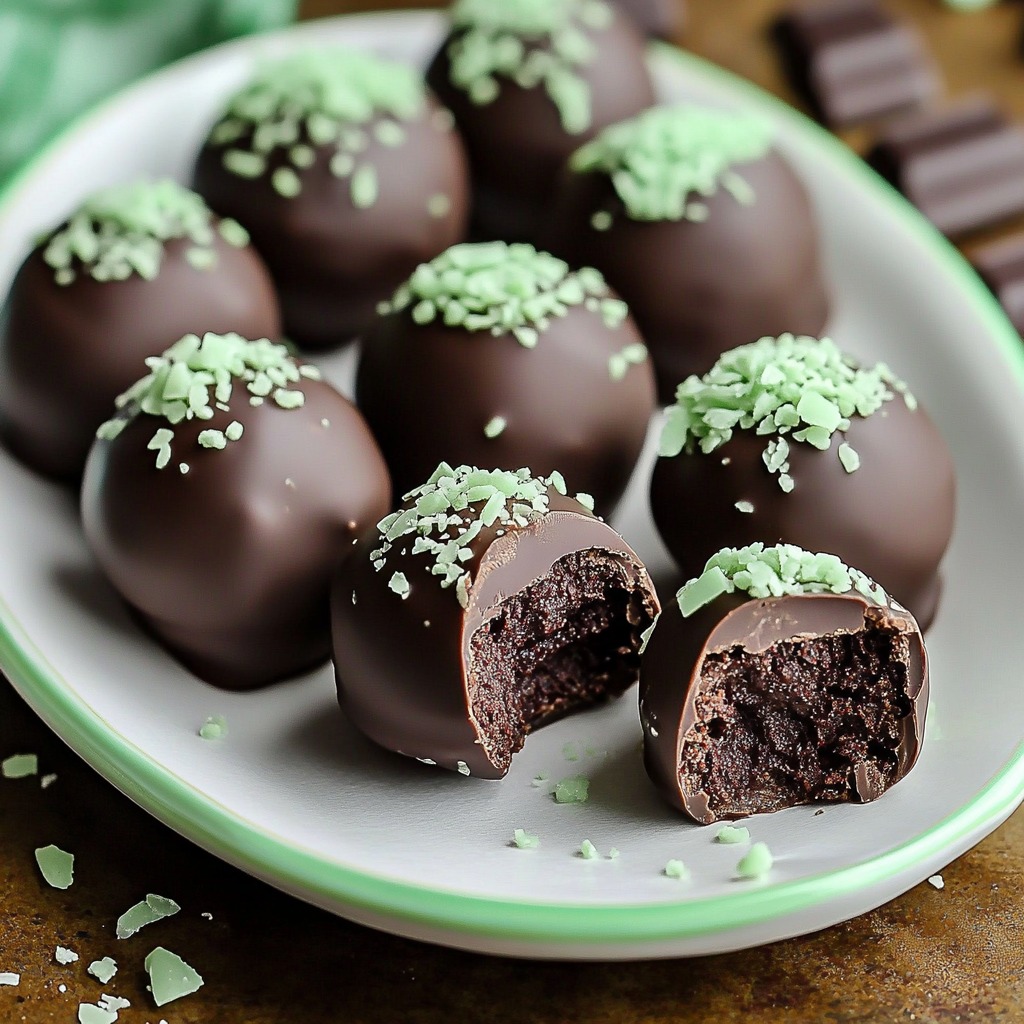
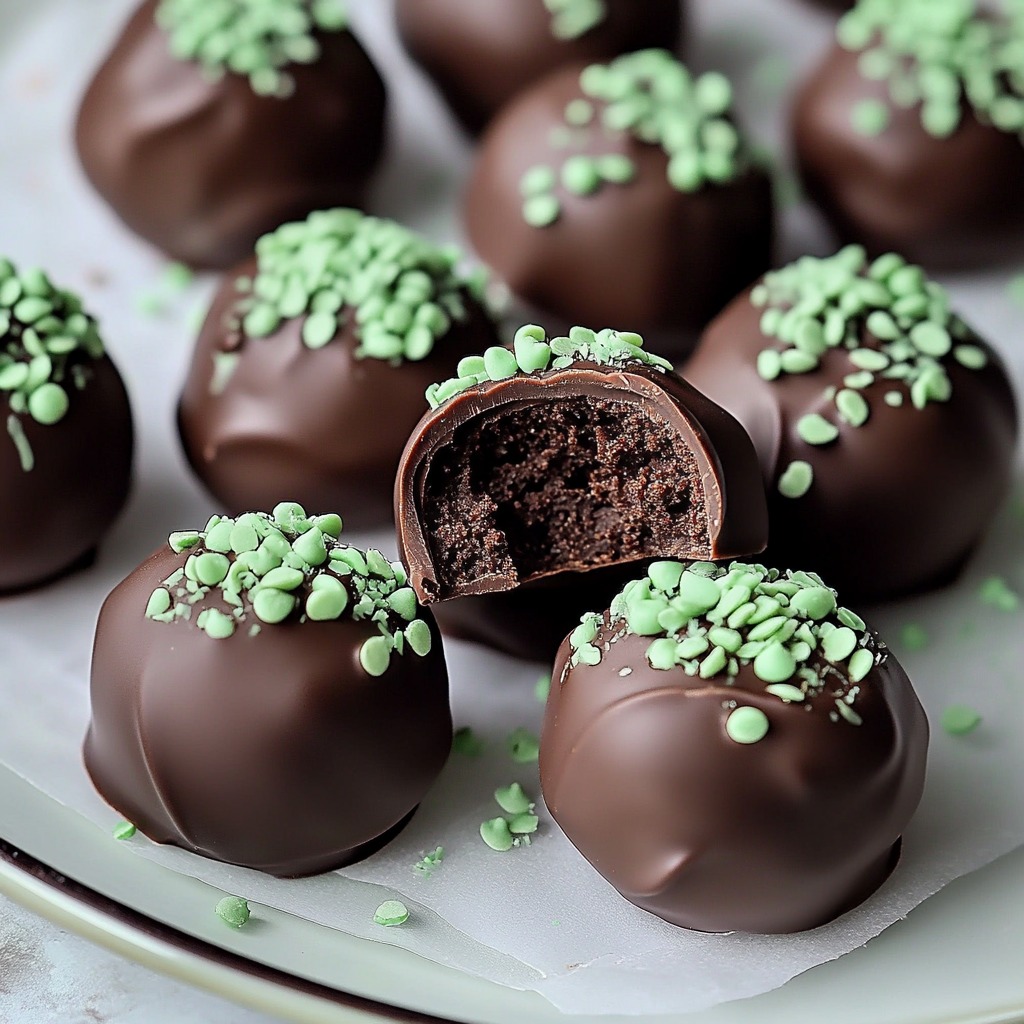
Transform simple Thin Mint cookies into fancy chocolate bites with this no-bake truffle method. Just a few items turn those mint-chocolate cookies and cream cheese into an amazing filling that's dipped in dark chocolate for a truly satisfying sweet treat.
I whipped up these truffles one time when I was pressed for time before a Christmas cookie swap. They were so loved that they've now become what everyone expects me to bring, and my friends always ask if I've got a batch with me whenever we hang out.
Ingredients
- Thin Mint cookies: Delivers that distinctive minty chocolate taste and forms the ideal foundation texture
- Cream cheese: Makes the cookie mixture smooth and acts as the perfect binder while adding richness
- Dark chocolate chips: Forms a gorgeous outer layer with deep flavors that complement the sweeter inside
- Coconut oil: Thins out the chocolate for easier coating and gives it a nice glossy look
- Crushed cookies or sprinkles for garnish: Makes them look prettier and boosts the minty flavor
- Mint leaves (optional): Adds a lovely fresh element for fancy serving occasions
Easy Preparation Steps
- Make your base mix:
- Grind Thin Mint cookies in a food processor until you've got super fine crumbs without any chunks left. It'll probably take around 30 seconds of pulsing. Your truffles will turn out smoother if your crumbs are really tiny.
- Mix the base:
- Throw in softened cream cheese with the cookie bits and pulse again until it all comes together as a thick, shapeable mix. You might need to push down stuff from the sides halfway. The mix should stick together when you squeeze it between your fingers.
- Shape your truffles:
- Take about a tablespoon of mix for each truffle and roll it between your hands to make nice round balls. Put each one on a baking sheet lined with parchment, leaving some space so they don't touch each other.
- Cool them down:
- Pop the tray with your truffle balls into the freezer for about 15-20 minutes. This super important step keeps them firm while you're dipping them and helps the chocolate stick properly.
- Get your chocolate ready:
- While your truffles are cooling, put dark chocolate chips and coconut oil in a bowl that's safe for the microwave. Heat it in 30-second bursts at half power, stirring really well each time. Keep going until it's all melted and looks shiny. It should be thin enough to coat but not too runny.
- Coat your truffles:
- Working in small batches, dunk each cold truffle ball into the melted chocolate using a fork. Tap the fork gently on the bowl's edge to get rid of extra chocolate, then carefully slide the truffle back onto the parchment paper.
- Top them off:
- Right away sprinkle crushed Thin Mint bits or green sprinkles on each truffle before the chocolate hardens. Work fast because the cold truffles will make the chocolate start to set quickly.
- Let them set:
- Put the coated truffles in the fridge for 10-15 minutes until the chocolate outside is totally hard. What makes these treats amazing is the difference between the crisp chocolate outside and soft truffle inside.
 Pin it
Room temperature cream cheese is really the magic ingredient here. After trying lots of batches, I found that warm cream cheese works way better than cold, making a smooth texture that goes perfectly with the cookie bits. My little girl now sits next to the food processor trying to sneak bites of the mix before I can roll them into balls.
Storage Tips
These truffles stay good in a sealed container in the fridge for up to two weeks, though they never stick around that long at my place. The flavor actually gets better after the first day as the mint spreads throughout. If you want to keep them longer, you can stick the finished truffles in the freezer for up to three months. Just let them thaw in the fridge overnight before you eat them.
Tasty Twists
For Christmas time, try using white chocolate for dipping and add smashed candy canes on top for a festive minty look. For spring parties, light colored sprinkles make these truffles great for Easter baskets or baby showers. When you can't find Thin Mints, just swap in Keebler Grasshopper cookies or Mint Oreos for almost the same taste.
 Pin it
Gift Presentation
These truffles work great as homemade gifts. Put them in tiny cupcake papers inside a pretty tin or small gift box, then wrap with ribbon for a thoughtful present. I've given these to teachers as thank you gifts, to party hosts, and even as wedding favors when packed in small clear bags with personalized tags.
Frequently Asked Questions
- → Can I swap Thin Mints for another type of cookie?
Sure thing! Mint-flavored cookies like Grasshoppers will work just as well.
- → What if I can’t use a food processor?
No worries! You can stick the cookies in a sealed bag and crush them with a rolling pin until they're fine crumbs.
- → How long can I store these chocolate bites?
You can keep them in the fridge inside a sealed container for a week, or freeze them for up to a month.
- → What’s a good coconut oil replacement?
If coconut oil isn’t handy, simply melt the chocolate alone or mix in a dash of butter to smooth it out.
- → How do I get the chocolate glaze to look smooth?
Melt your chocolate gently, stirring often to keep it shiny without any clumps. A little butter or coconut oil can make all the difference!
- → Can I prepare these treats in advance for an event?
Absolutely! Make them the day before and pop them in the fridge—they’ll be ready to wow your guests.